Touchups & Painting
- Melissa S.
- Feb 22, 2021
- 3 min read
After the interior corking, there were a few areas that needed some touchups. Luckily, I had some leftover cork, so I watered it down a bit to make a slurry, and I used a putty knife to apply it. As you can see, this product is VERY forgiving and easy to fix, if ever you need to fill in any cracks or imperfections! Thank you to Roth from Innovative Cork for providing exceptional customer service for my cork projects! If you have any building or renovation projects, check out the almost limitless applications that could benefit from a cork finish with Innovative Cork - you won't be disappointed!
After the touchups, it was time for paint. My number one concern with my build is having exceptional indoor air quality, so I wanted a natural paint that doesn't have any chemicals or VOCs. Milk paint was an obvious choice, though I was worried about its finish and durability. So I found mineral paint by Fusion (a small, Canadian company, which I purchased at Windsor Plywood- a GREAT store for hard-to-find building materials, especially if you're searching for green options!).

It was pricey but promised excellent coverage with no primer required. What I hadn't banked on was how much paint the cork would soak up, both because of its porous nature and its textured finish. One 500mL can was supposed to cover 75 sq ft, but it ended up only covering 20 sq ft, so I would've had to purchase almost four times more paint, paint that was already more expensive than I had planed on, and that would've been just one coat (NOT Fusion's fault - that 75 sq ft claim was based on smooth, non-porous walls...lesson learned!). So I had to come up with another plan. I thought maybe I could use a different primer then still use the Fusion paint for the final coat (thereby only requiring one coat of paint).
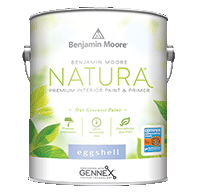
I found Benjamin Moore's Natura primer (zero VOC and certificed allergy and asthma friendly) at Janzen's Paint (another great store, as besides being a paint store, they are ALSO a hobbyist store with oodles of board games, puzzles, Lego, art supplies, and model cars/trucks/boats - you are going to spend WAY more time here than you had anticipated, as the fun level is SUPER HIGH!), and used that for priming the walls.

It was the THICKEST primer I've ever seen (think sour cream...!), so I ended up using 6.5 gallons for my crazy corked walls, and at that rate, I was nervous about then purchasing four times more Fusion paint for the top coat, so I opted to return the unused Fusion paint and get Benjamin Moore's Natura paint for the top coat (same great features of zero VOC, allergy and asthma friendly) in "Cloud Cover" (OC-25: a white paint with grey undertones).
I thought it would take just as much paint as it did primer, so I purchased six gallons of paint, thinking it might only be enough for one coat, but the primer must have done a great job of sealing the cork, and I only used 3.5 gallons for TWO coats, so needless to say, I have a bit extra...haha (never a terrible thing when only halfway through your build!).
Here are some pics of the painting process:
Next step will be removing the window masking, painting the window returns, and adding window casing. I'm loving the progress! Here are some fun pics of Dasi helping me paint!


Comments